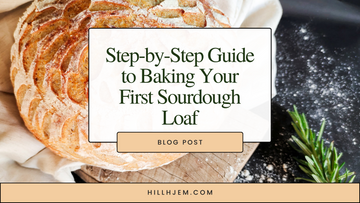
I remember the first time I held a freshly baked sourdough loaf – that golden crust begging to be broken, the intoxicating aroma filling the kitchen. It felt like a magic trick, transforming simple flour and water into something so beautiful and delicious. But let's be real, the journey to that first loaf wasn't always smooth sailing.
This step-by-step guide will walk you through the process, from creating your sourdough starter to baking your loaf.
What You'll Need
Ingredients:
- Flour: Unbleached all-purpose flour or bread flour
- Water: Filtered or bottled water, at room temperature
- Salt: Fine sea salt
Tools:
- Mixing bowls
- Kitchen scale
- Plastic or wooden spoon
- Dough scraper
- Proofing basket (banneton) or a bowl lined with a clean kitchen towel
- Dutch oven or a heavy pot with a lid
- Parchment paper
- Sharp knife or bread lame
Step 1: Creating Your Sourdough Starter
Day 1:
Combine Flour and Water: Mix 50 grams of flour with 50 grams of water in a bowl. Stir until well combined. Cover loosely with a cloth and let it sit at room temperature for 24 hours.
Day 2-7:
Daily Feeding: Each day, discard half of the starter mixture and add 50 grams of flour and 50 grams of water. Stir to combine, cover, and let it sit at room temperature. By day 7, your starter should be bubbly and have a pleasant sour smell. This indicates it's ready for baking.
Step 2: Preparing the Dough
Ingredients:
- 500 grams of bread flour
- 350 grams of water
- 100 grams of active sourdough starter
- 10 grams of salt
1. Mix the Dough: In a large bowl, combine the flour and water. Mix until no dry flour remains. Cover and let it rest for 30 minutes (this process is called autolyse).
2. Add Starter and Salt: Add the sourdough starter and salt to the dough. Mix well until the ingredients are fully incorporated.
3. Kneading: Use the stretch and fold technique to develop the gluten. Stretch the dough from one side and fold it over itself. Turn the bowl 90 degrees and repeat. Do this for about 5-10 minutes until the dough becomes smooth and elastic.
Step 3: Bulk Fermentation
1. First Rise: Cover the bowl with a cloth and let the dough rise at room temperature for 3-4 hours, or until it has doubled in size. During this time, perform a set of stretch and folds every 30 minutes for the first 2 hours.
2. Shaping: After the bulk fermentation, gently turn the dough out onto a lightly floured surface. Shape it into a round by folding the edges into the center. Flip the dough seam-side down and use your hands to create tension on the surface by pulling the dough towards you.
Step 4: Proofing
1. Second Rise: Place the shaped dough into a proofing basket or a bowl lined with a floured kitchen towel. Cover and let it proof for 2-4 hours at room temperature, or overnight in the refrigerator for a slower, more flavorful rise.
Step 5: Baking
1. Preheat the Oven: Place a Dutch oven or a heavy pot with a lid into your oven and preheat to 475°F (245°C).
2. Score the Dough: Once the oven is preheated, carefully turn the dough out onto a piece of parchment paper. Use a sharp knife or bread lame to make a few slashes on the surface of the dough. This allows steam to escape and helps the bread expand during baking.
3. Bake: Carefully remove the preheated Dutch oven from the oven. Lift the dough using the parchment paper and place it into the pot. Cover with the lid and bake for 20 minutes. Remove the lid and bake for an additional 25-30 minutes, or until the crust is deep golden brown.
4. Cool: Remove the loaf from the pot and let it cool on a wire rack for at least an hour before slicing. This allows the interior to set properly.
Congratulations! You've baked your first sourdough loaf. Enjoy it with butter, use it for sandwiches, or simply savor the unique flavors of your homemade bread. Sourdough baking is an art that improves with practice, so keep experimenting and refining your technique.
Happy baking!


